Create and Send Customer Invoices via Bulk Import
Purpose #
This procedure explains how to import customer invoices in bulk into Xero, review them, approve them, and send them to customers.
System Access
System: XERO
Login: Log in to Xero using your assigned credentials.
Additional : How to import sales invoices in bulk into Xero
Procedure #
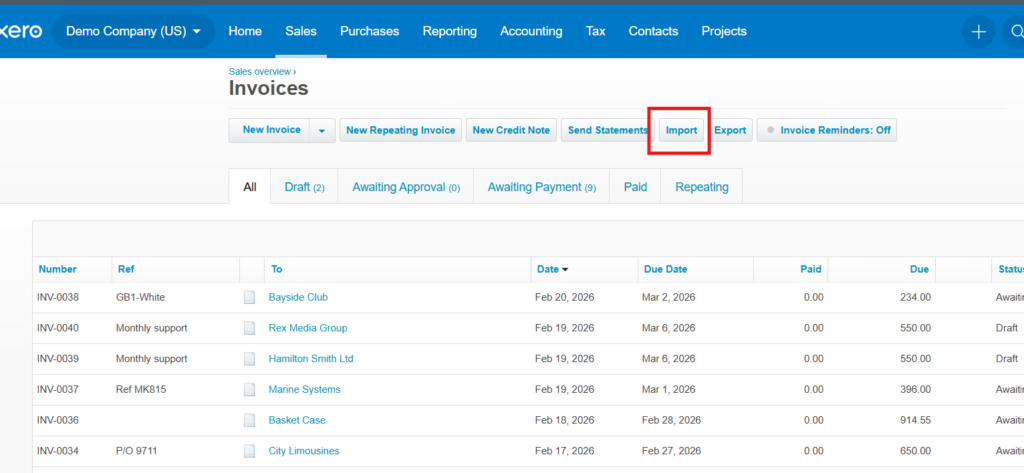
Step 1: Navigate to Invoice Import #
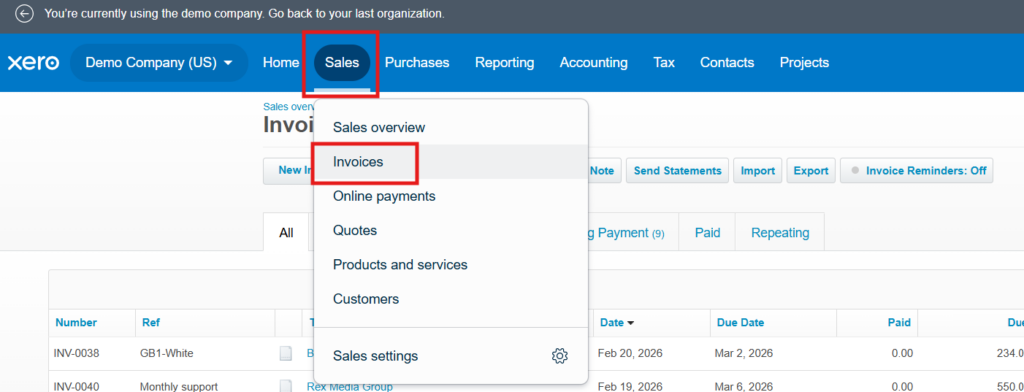
- From the top menu, select Sales.
- Click Invoices.
- Click the Import button.
Step 2: Download the Import Template #
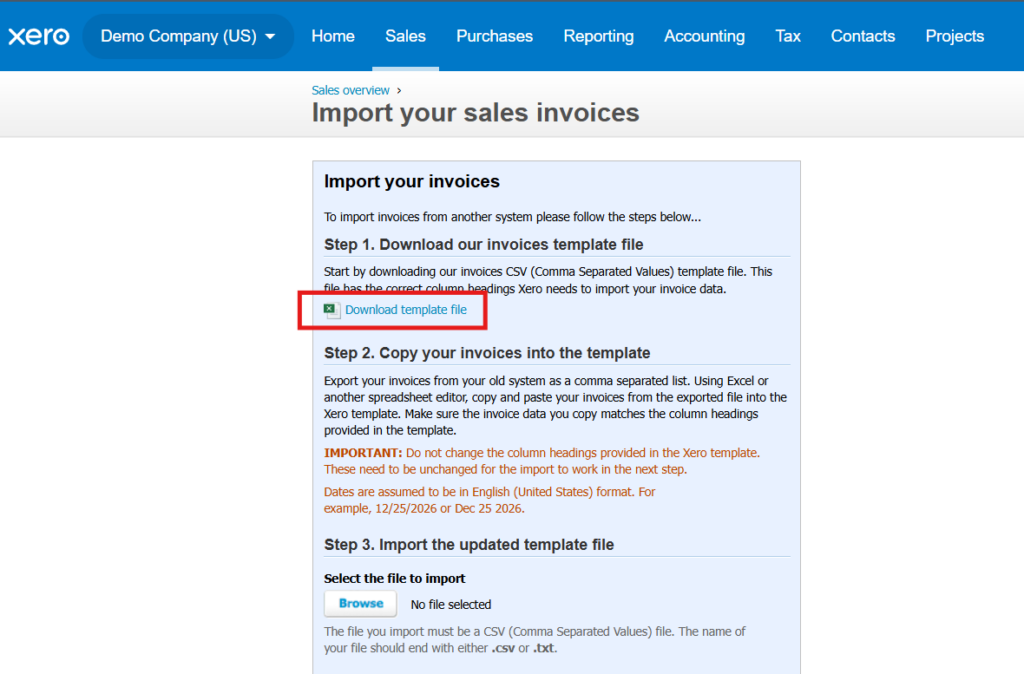
- Select Download template file.
- Save the template to your computer.
Step 3: Prepare Invoice Data #
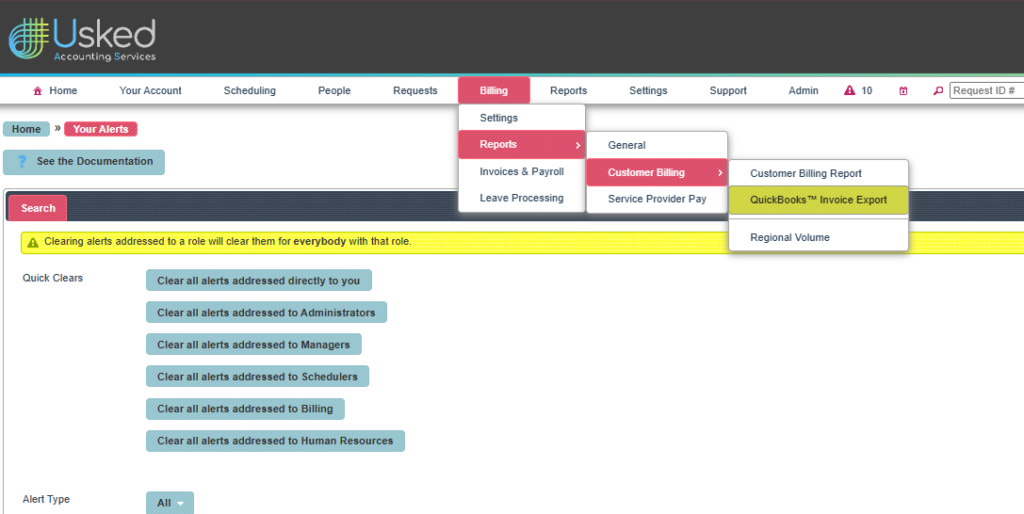
- Download the invoice export file from Usked (QuickBooks Invoice Export).
- Open and copy and paste the invoice data into the Xero invoice import template.
- Ensure all data matches the corresponding column headers in the Xero template.
Field Mapping Tips (QuickBooks Export → Xero)
*= Required field
- Customer → *ContactName
- RefNumber → *InvoiceNumber
- LineItem → InventoryItemCode
- LineUnitPrice → *UnitAmount
- *AccountCode → Use only valid numeric account codes from Xero’s Chart of Accounts.
- *TaxType → Use only tax types configured in Xero.
- If the service is tax exempt, use: Tax Exempt (0%)
- If the service is tax exempt, use: Tax Exempt (0%)
Important: Incorrect AccountCode or TaxType values will cause import errors.
Step 4: Import the Template File #
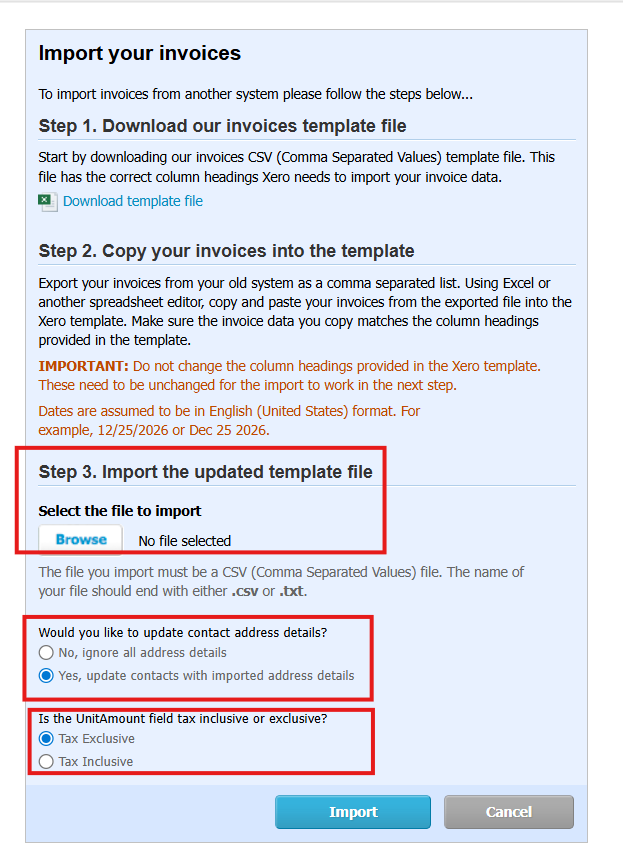
- Return to Sales > Invoices > Import.
- Click Browse to select the file to import.
- Choose whether to:
- Update contact address details (Yes/No)
- Yes – New customer or changes to existing customer info
- No – Existing customer with no updates
- Include or exclude taxes in the Unit Amount field
- Update contact address details (Yes/No)
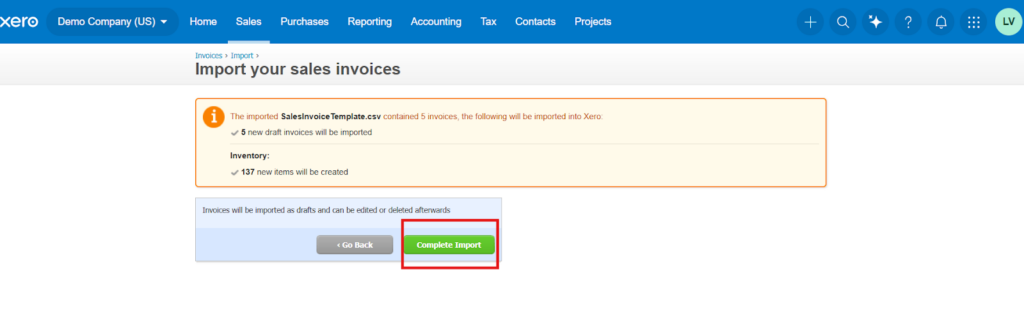
- Click Import.
- Click Complete Import.
Step 5: Review Imported Invoices #
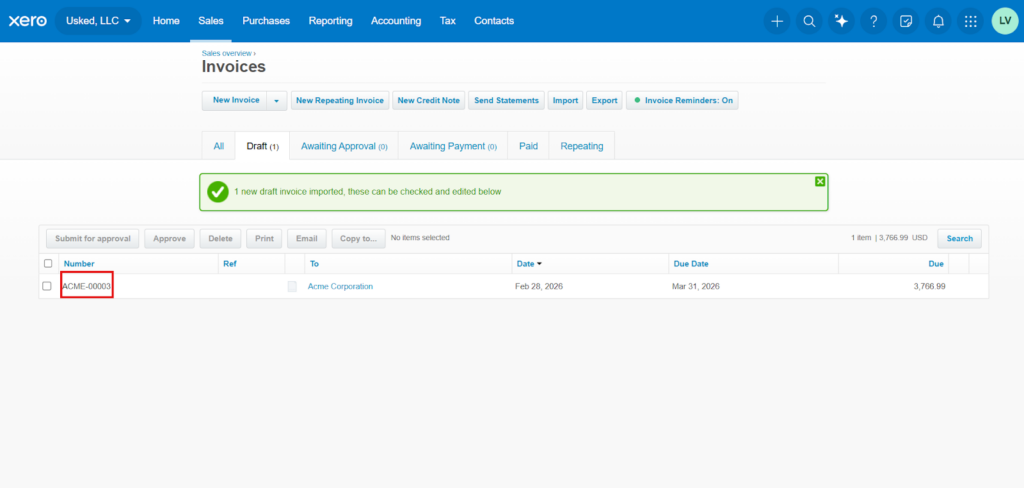
- Navigate to Sales > Invoices.
- Select the Draft tab.
- Review each invoice for accuracy.
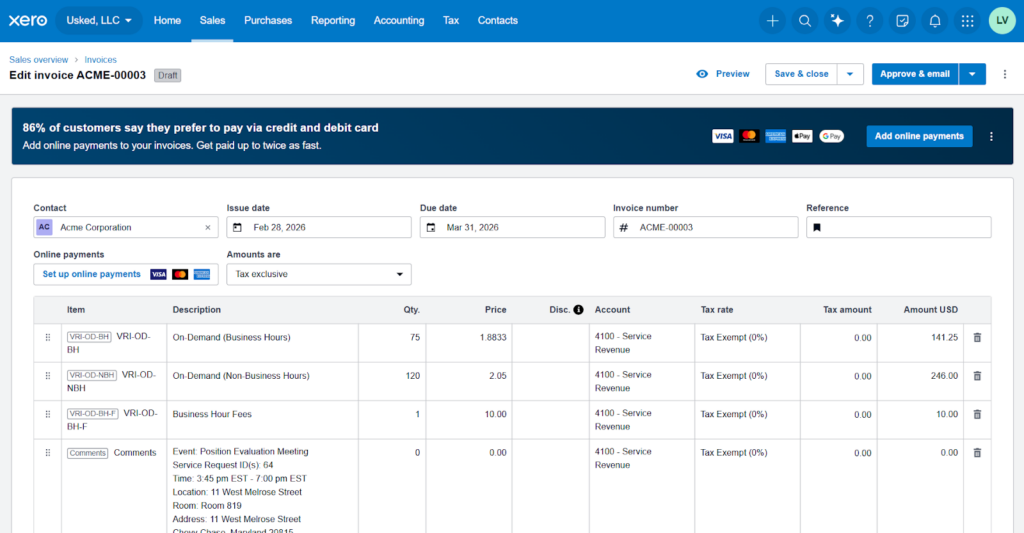
- Click the invoice number to open and review details.
- Make corrections if needed.
Step 6: Approve Invoices #
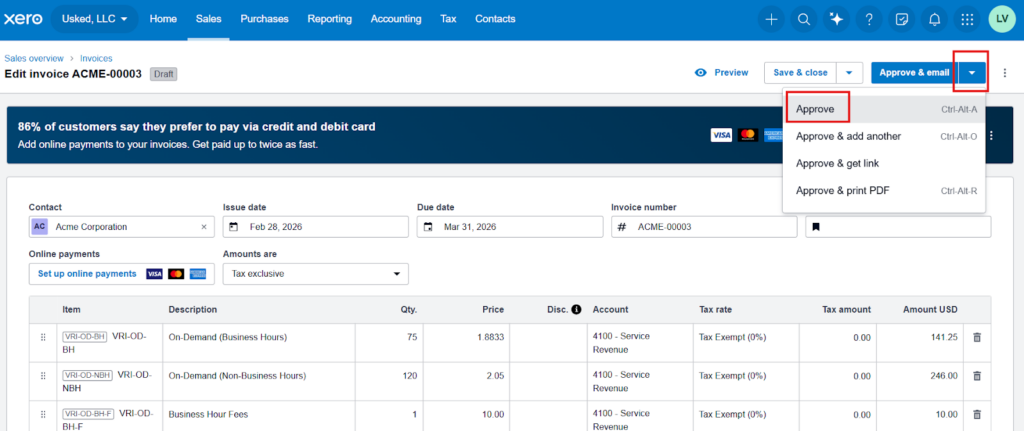
Option A: Approve Immediately #
If the invoice is ready:
- Click Approve.
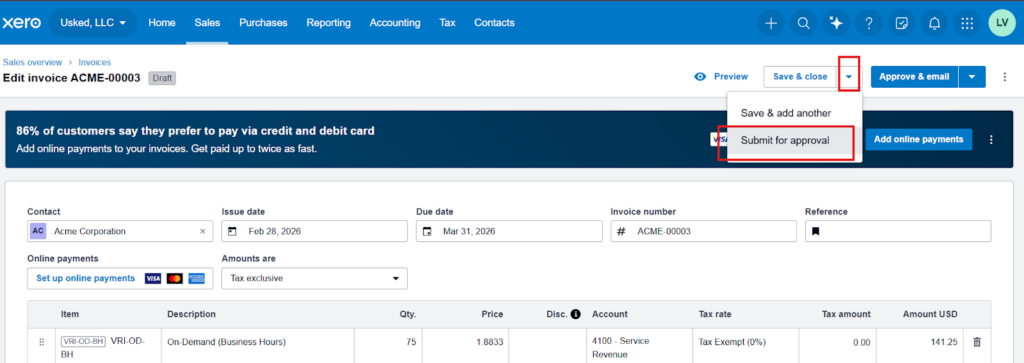
Option B: Submit for Approval #
If approval is required from another user:
- Click the Save & Close dropdown.
- Select Submit for Approval.
Once approved, invoices move to the Awaiting Payment tab.
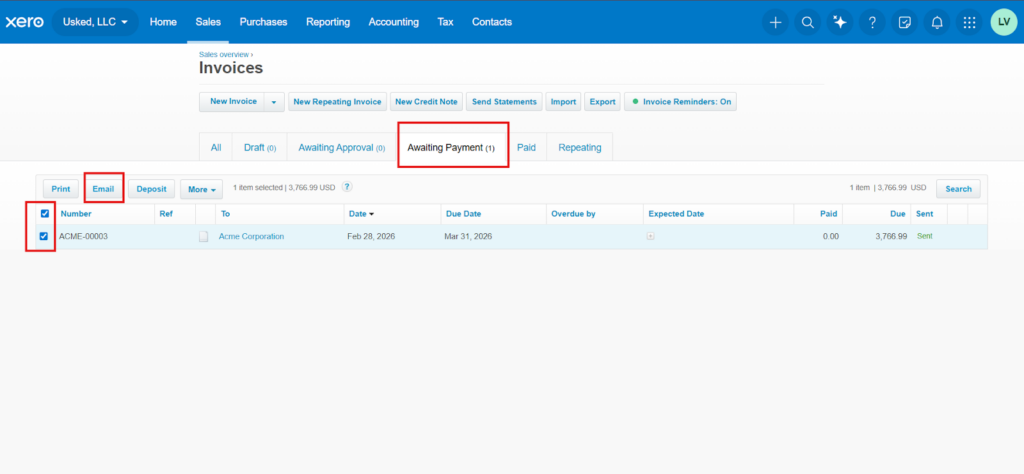
Step 7: Email Invoices to Customers #
- Go to Sales > Invoices.
- Select the checkbox next to the invoice(s).
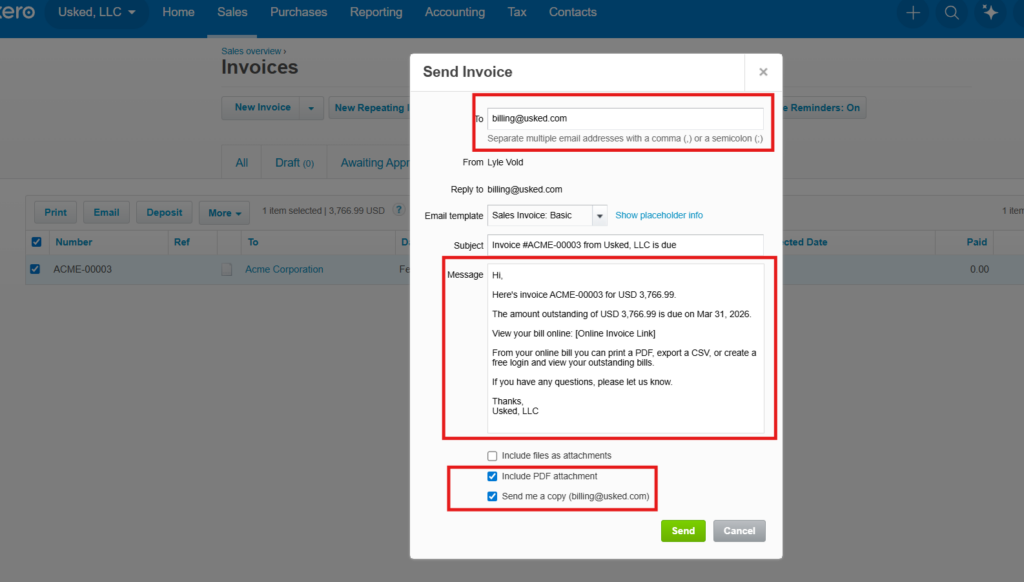
- Click Email.
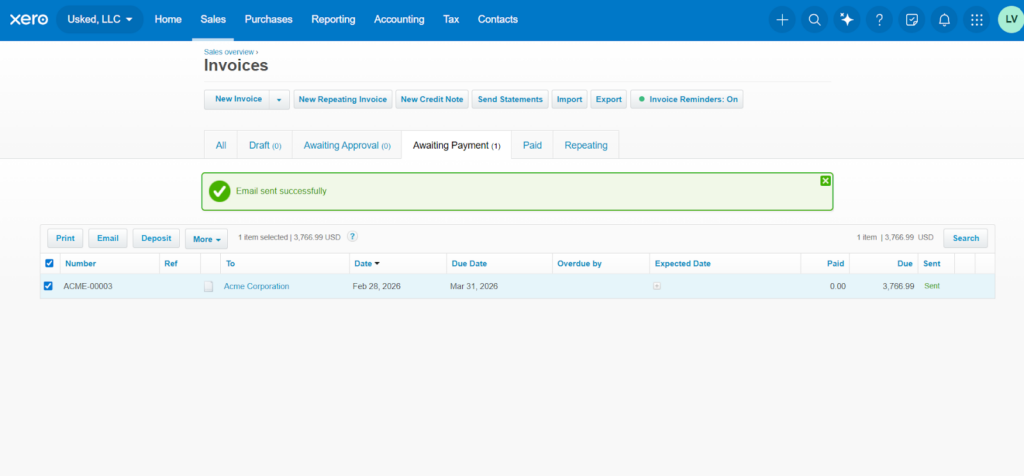
- Follow the prompts to send.
You may send:
- Individual invoices, or
- Multiple invoices in bulk