
Import Supplier, Vendor, and Contractor Bills into Xero via Bulk CSV Import
Purpose #
This procedure outlines the steps to export payroll bill data from Usked and import supplier, vendor, and contractor bills into Xero using the bulk CSV import feature.
Prerequisites #
- Active access to Xero
- Access to your Usked account
- Bills exported in CSV format
- Valid Account Codes configured in Xero
- Valid Tax Types configured in Xero
- Spreadsheet editor (Excel or equivalent)
System Access
System: XERO
Login: Log in to Xero using your assigned credentials.
Additional: How to Import Bills into Xero
Part 1: Export Bill CSV from Usked #
Step 1: Access Payroll Reports #
- Log in to your Usked account.
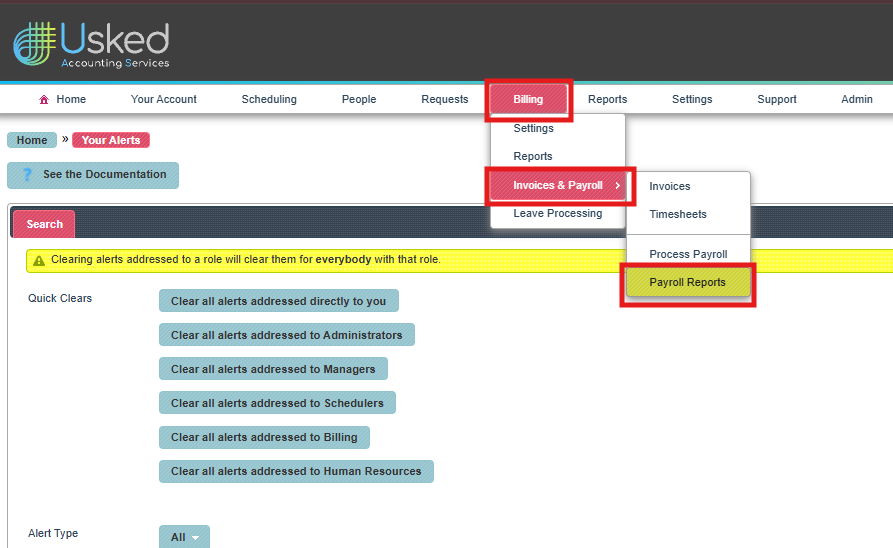
- Navigate to:
Billing > Invoices & Payroll > Payroll Reports
Step 2: Export QuickBooks Bill CSV #
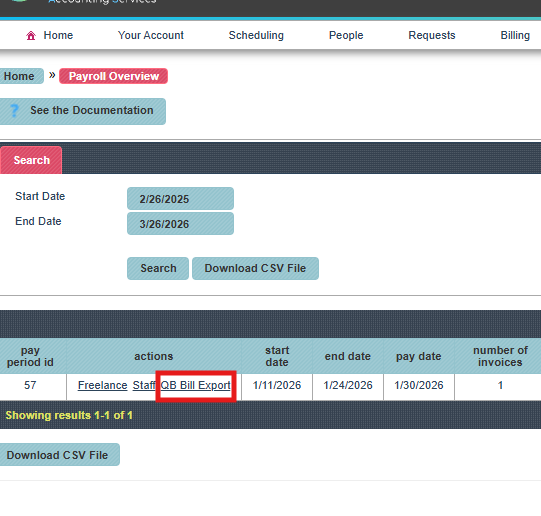
- Locate the correct payroll report.
- Click the QB Bill Export button.
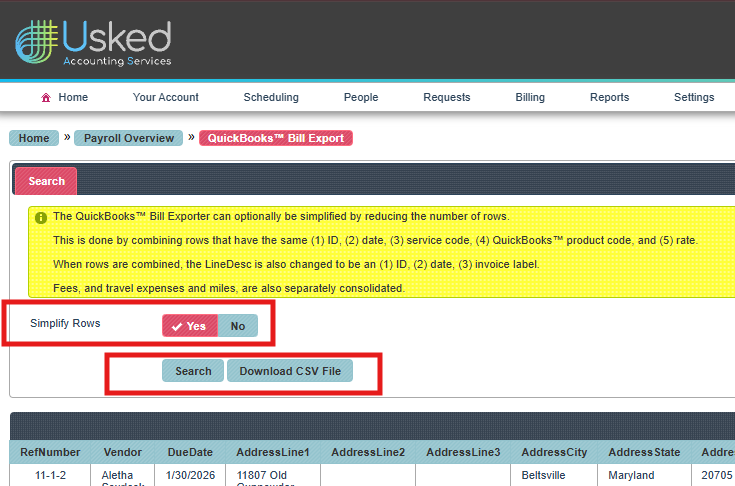
- On the next screen:
- Click Yes to simplify the rows and minimize bill details.
- Click Search.
- Click Download CSV File.
- Click Yes to simplify the rows and minimize bill details.
- Save the CSV file to your computer.
Part 2: Download and Prepare the Xero Import Template
Importing bills into XERO:
Step 1: Access the Bill Import Function #
- Log in to Xero.
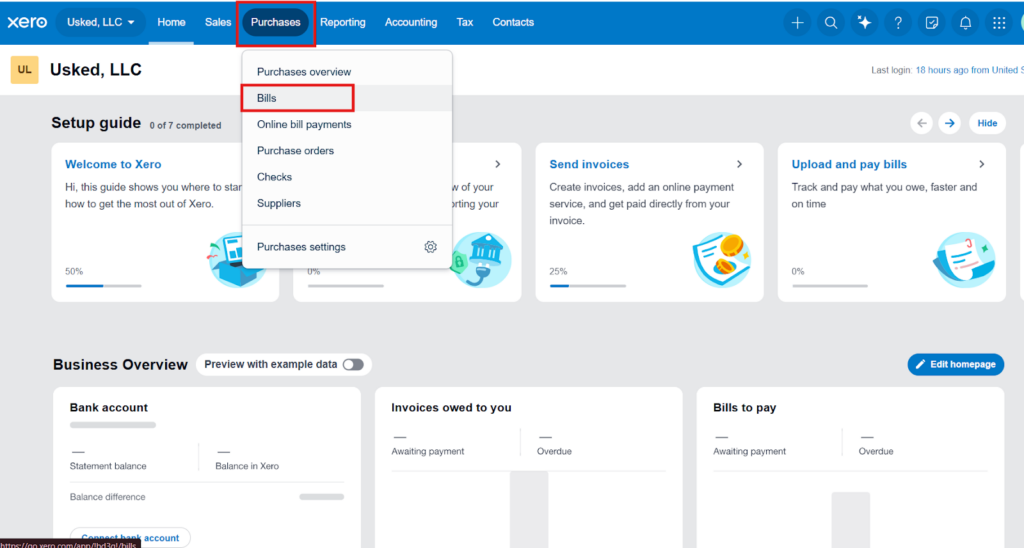
- Navigate to the Purchases menu.
- Click Bills.
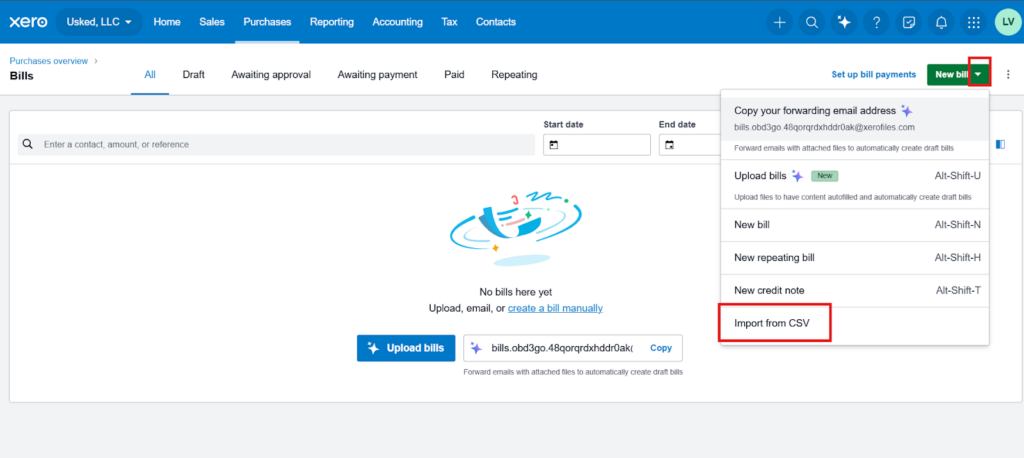
- Click the dropdown arrow next to the green New Bill button.
- Select Import from CSV.
Step 2: Download the Template #
- Click Download the Xero import template.
- Open the template using Excel or another spreadsheet editor.
Step 3: Copy and Paste Bill Data #
- Open the Usked QuickBooks Bill Export CSV file.
- Copy the bill data.
- Paste the data into the Xero template.
- Ensure all information matches the column headings exactly.
- Save the completed file as a CSV.
Important Template Guidelines #
- Do NOT modify the column headings in the Xero template.
- All fields marked with an asterisk (*) are required.
- Dates must be in U.S. format:
- Example: 12/25/2026 or Dec 25 2026
- Example: 12/25/2026 or Dec 25 2026
- Contact names must match exactly how they appear in Xero.
- This prevents duplicate supplier or contractor records.
- This prevents duplicate supplier or contractor records.
- Save the file in CSV format before importing.
Required Field Mapping #
InventoryItemCode
- Use the LineItem column from the QuickBooks export file.
AccountCode
- Use only valid numeric account codes from Xero’s Chart of Accounts.
TaxType
- Use only tax types configured in Xero.
Tax Exempt Services
- For independent contractors or tax-exempt services, use:
Tax Exempt (0%)
Part 3: Import the Bills into Xero #
Step 1: Upload the CSV File #
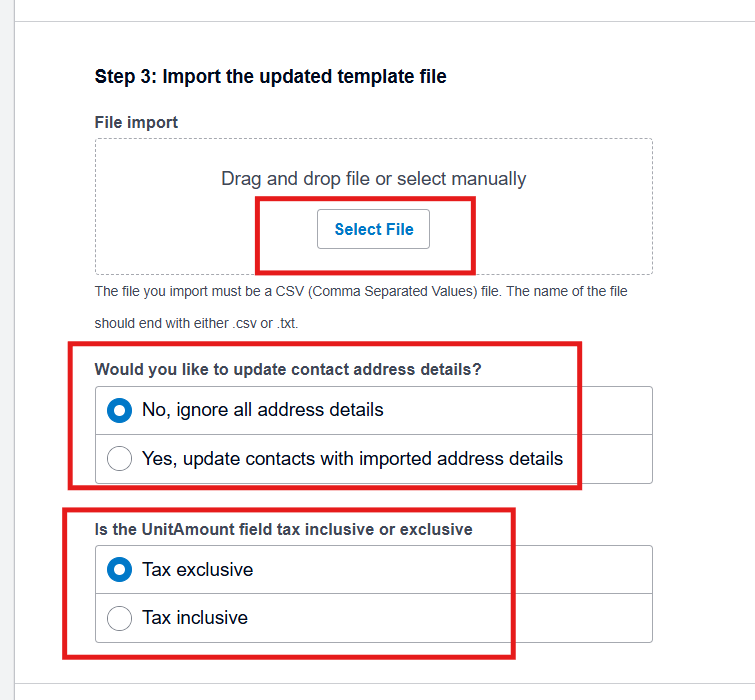
- Navigate to the Import from CSV screen in Xero.
- Click Select File.
- Choose your completed Xero template CSV file.
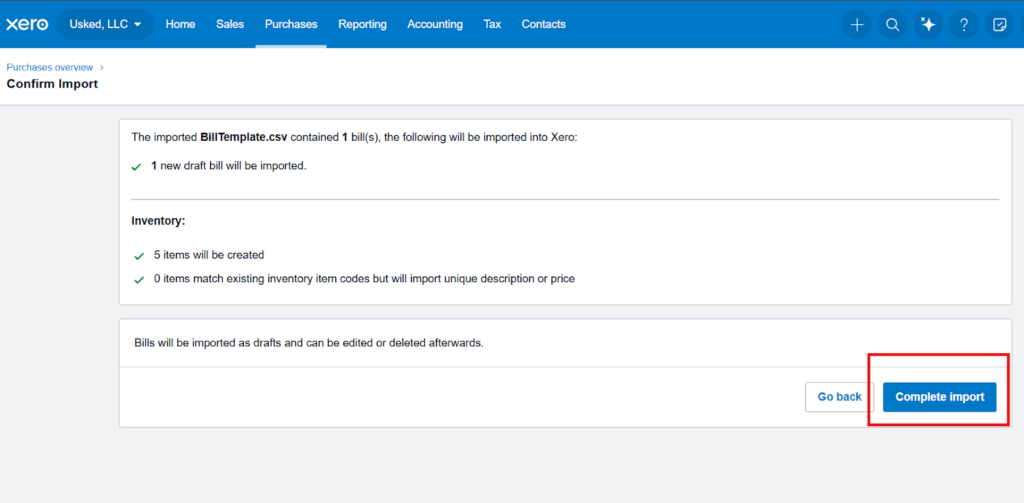
- Click Confirm.
- Click Complete Import.
Part 4: Review, Edit, and Approve Bills #
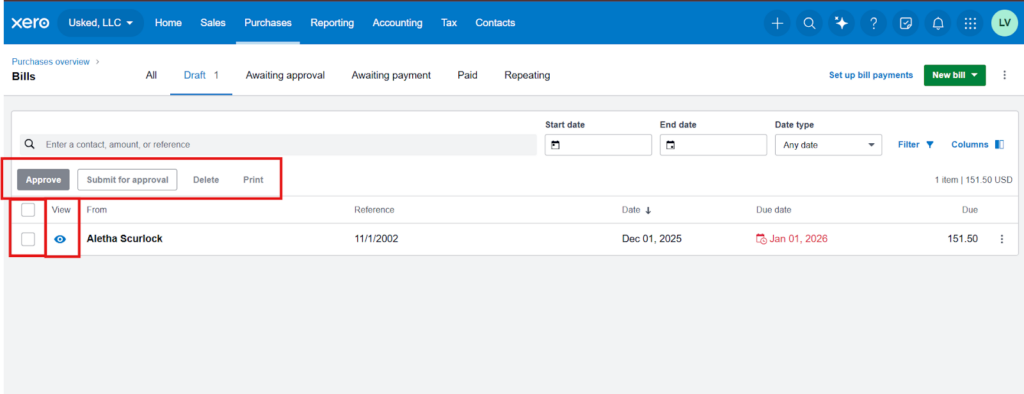
After import, bills will appear in draft status.
To Review or Edit Bills #
- Locate the imported bill.
- Click the eye icon to open the bill.
- Review the information.
- Make edits if necessary.
- Click Save after making changes.
To Approve Bills #
Bills must be approved individually.
Option 1: Approve the Bill
- Select the bill.
- Click Approve.
Option 2: Submit for Approval
- Select the bill.
- Click Submit for Approval.
Once approved, bills will move to the appropriate status for payment processing.