Table of contents
- This article will go through the steps of how to set up service provider pay rates in your Usked account. But first a word from our pal the Dinosaur.
- What is a service provider pay rate?
- Who can set up a service provider pay rates?
- How can we set up a service provider pay rate?
This article will go through the steps of how to set up service provider pay rates in your Usked account. But first a word from our pal the Dinosaur. #

What is a service provider pay rate? #
A pay rate is a rate you’d want to pay your staff and freelance service providers. In Usked, this includes business hour rates, non-business hour rates, holidays, etc!
Who can set up a service provider pay rates? #
Anyone with a billing staff role!
How can we set up a service provider pay rate? #
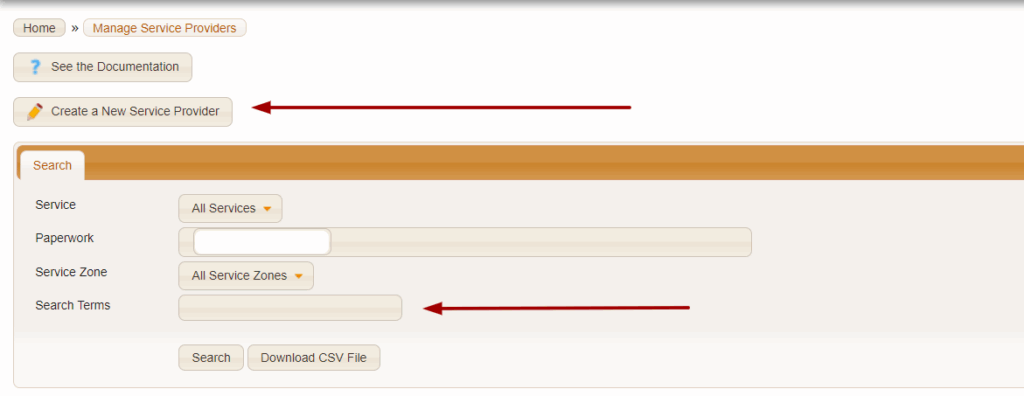
To set up a pay rate for a service provider, we are going to navigate to PEOPLE > SERVICE PROVIDERS. If you are setting up a rate for a new service provider, click “Create a new Service Provider”. If it’s an existing Service Provider, type in their name in the search terms field.
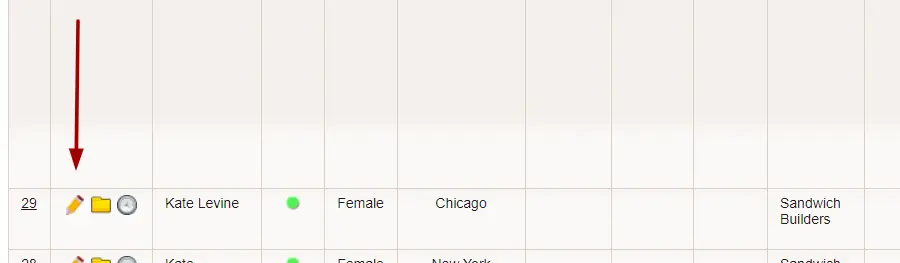
Once you have created/found your service provider, click on the pencil icon to edit their service provider profile.
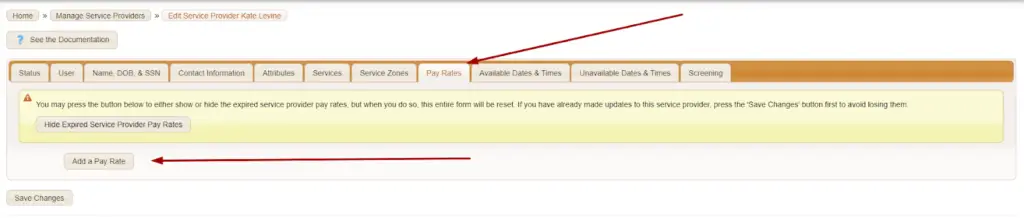
We will be working in the “pay rates” tab. When you are ready, click on the button “Add a Pay Rate”
This is where you will enter all the rates for the various services this person provides. This tab is structured to show each service code along with each of the differentials you originally set up. (The number of service codes you can add is limitless!) Let’s go through each of the following fields.

Service Zone – Using this field, service provider’s can be paid a different rate for providing the same service in a different service zone. If the rate is the same no matter what zone they are in, leave this field as the default “All Service Zones”
EXAMPLE: Kate will be paid 80 dollars for a job in NJ, but 100 dollars for a job in NYC. If you’d like her to work a job in NYC, enter the NYC service code in so she get’s the different rate.
Service Code – This field will drop down a list of all service codes created within your site. Select the code you’d want to add for this service provider. You will know you’ve entered a valid service code when this triangle turns into a green check mark.


Eff Date – This is the date this rate becomes effective. If this rate is replacing a previous rate (i.e. a rate increase), you’ll have to expire the old rate and create this new effective rate the same date.
Exp Date – The end/expiration date for this rate.
EXAMPLE OF HOW TO USE EFF/EXP DATE FIELDS: Kate’s pay rate has been 80 dollars but in the new year it will change to 90 dollars. On her pay rate set to 80 dollars, you’d add an expiration date of 12/31. On the new pay rate set to 90 dollars, you’d add an effective date of 1/1. This means the 80 dollar rate will end on 12/31 and the 90 dollar rate will begin on 1/1.
BH Rate – This is the business hour rate for this service code.
Non-BH Rate – This is the non business hour rate for this service code.
BH Fee – This is a flat fee assigned to any assignment using this service code during business hours. If there is no fee, enter 0. It cannot be left blank.
Non-BH Fee – This is a flat fee assigned to any assignment using this service code during non-business hours. Similar to BH Fee, enter 0 if there is no fee. It cannot be left blank.
Min Time – The minimum amount of time paid (in minutes) to the provider.
Increment – This is the number of minutes to define the increments of which a service provider is paid.
Rate Notes – Any notes to help define this pay rate.
For more on rates and the bill/pay reports available in Usked, please see these articles:
How to Set Up a Customer Billing Rate