Import and Submit Customer Invoices via QBO
Purpose #
This procedure outlines the steps required to import customer billing invoices into QuickBooks Online (QBO) using Usked Invoice Export file through the native import feature, while maintaining data integrity and preventing duplicate or incorrect records.
This guide is intended for users importing customer invoices into QBO using its built-in CSV import feature. Transaction Pro is not used in this process.
⭐ Highly Recommended #
Transaction Pro (recommended automation tool)
Transaction Pro may be used to streamline and automate the invoice import process in QuickBooks Online.
Benefits:
- Automates recurring imports
- Overrides or updates existing data when needed
- Reduce manual corrections and rework
- Minimize steps required in the Pre-QBO Invoice Data Import checklist
- Improves audit trail visibility and control
Want to set up Transaction Pro now? Click here.
System Access #
System: QuickBooks Online
Login: Log in to QBO using your assigned credentials.
Procedure #
- Pre-QBO Invoice Data Import Checklist
- Step 1 – Usked Invoice Export File
- Step 2 – Review Existing Master QBO Data
- Step 3 – Update Lists (Locations, Classes, Products & Services)
- Step 4 – Update Customers Addresses
- QBO Import Data
- Step 1 – Open Import Tool
- Step 2 – Select Record Type
- Step 3 – Upload CSV File
- Step 4 – Map Fields
- Step 5 – Validate & Import
- Submit Customer Invoices via QBO
- Step 1 – Update Invoice Template
- Step 2 – Update Message Template
- Step 3 – Review Customer Invoices
- Step 4 – Submit Customer Invoices
Pre-QBO Invoice Data Import (Required Checklist) #
Complete ALL steps before importing invoice data into QBO. Failure to complete these steps may result in import errors or duplicate records.
- Step 1 – Usked Invoice Export File
- Step 2 – Review Existing Master QBO Data
- Step 3 – Update Lists (Locations, Classes, Products & Services)
- Step 4 – Update Customers Addresses
Step 1 – Usked Invoice Export File #
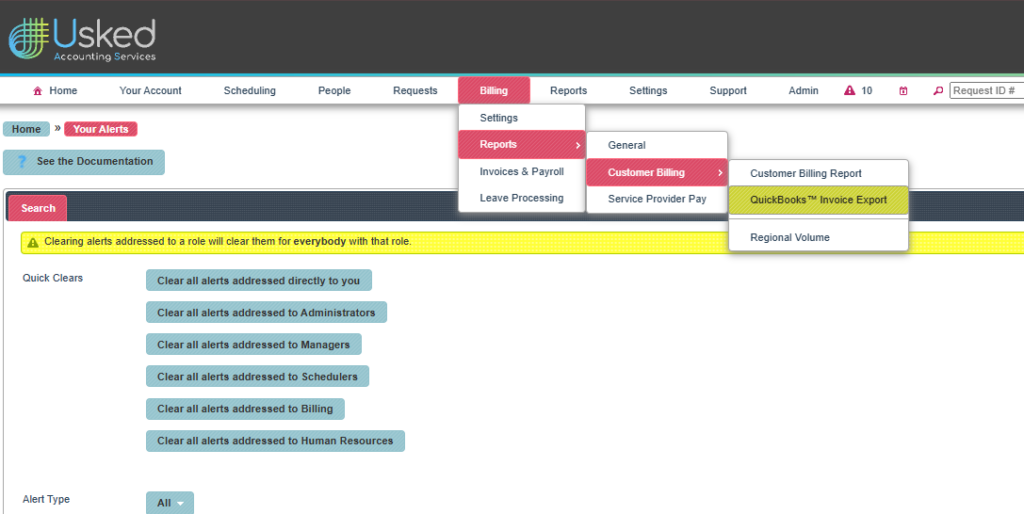
- Billing Menu → Reports → Customer Billing → QuickBooks Invoice Export
- Update the Start/End Date in the Search Criteria
- Click Search
- Download CSV File
- Add two new columns
- TxnDate → Invoice Date
- DueDate → Invoice due Date

- Verify the Refnumber column
- No duplicate invoice numbers
- Invoice numbering follows billing sequence.
⚠️Duplicate invoice numbers will cause import failures.
- Save the file to your computer
Step 2 – Review Existing Master QBO Data #
Ensure that the following lists and addresses exist in the QBO Data.
- Lists
- Customer Addresses
Step 3 – Update Lists #
Click the links below for step-by-step instructions
- Products & Services ⚙️ Settings → Lists → Product and Services
- Locations⚙️ Settings → Lists → All Lists → Locations
- Classes⚙️Settings → Lists → All Lists → Classes
Step 4 – Update Customer Addresses #
All Apps > Customer Hub > Customer > Edit > Addresses
⚠️ Customer names must match exactly or duplicate customer records may be created during import.
⚠️The Bill To Address will pull from the QuickBooks Online Customer Hub instead of Usked Invoice Export file if Transaction Pro is not used.
QBO Import Data #
- Step 1 – Open Import Tool
- Step 2 – Select Record Type
- Step 3 – Upload CSV File
- Step 4 – Map Fields
- Step 5 – Validate & Import
Step 1 – Open Import Tool #
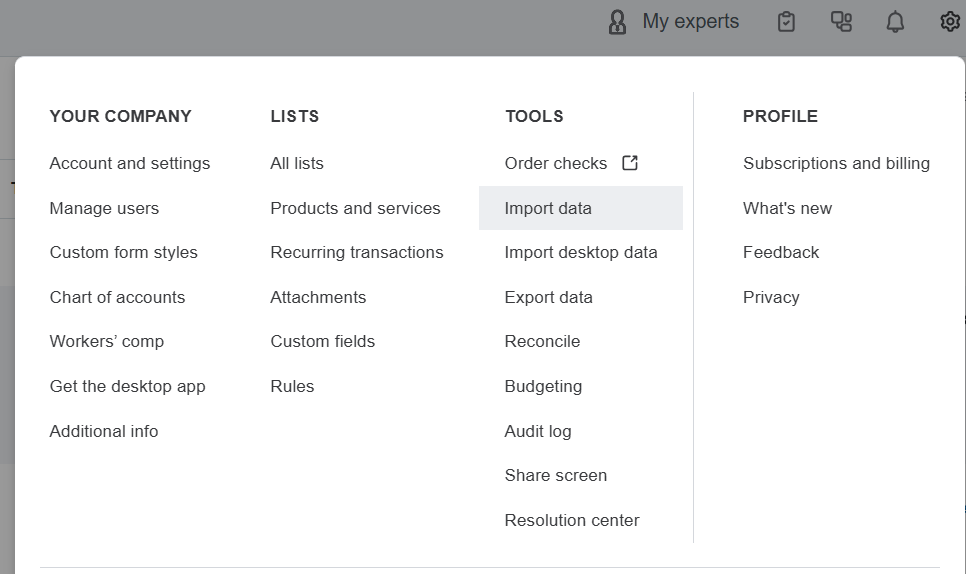
- Go to Settings⚙️ → Tools – Import Data
Step 2 – Select Record Type #
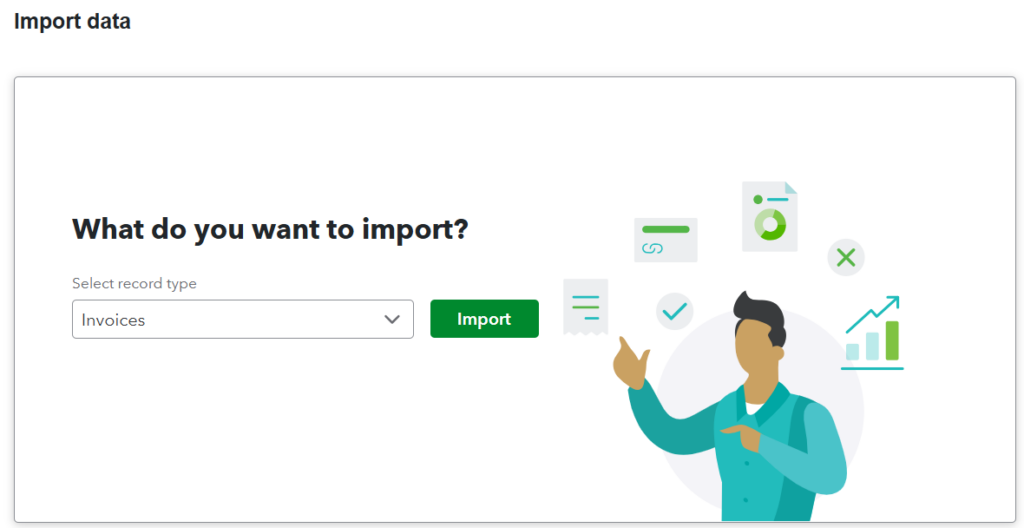
- Select record type → Invoices
- Click the green button Import
Step 3 – Upload CSV File #
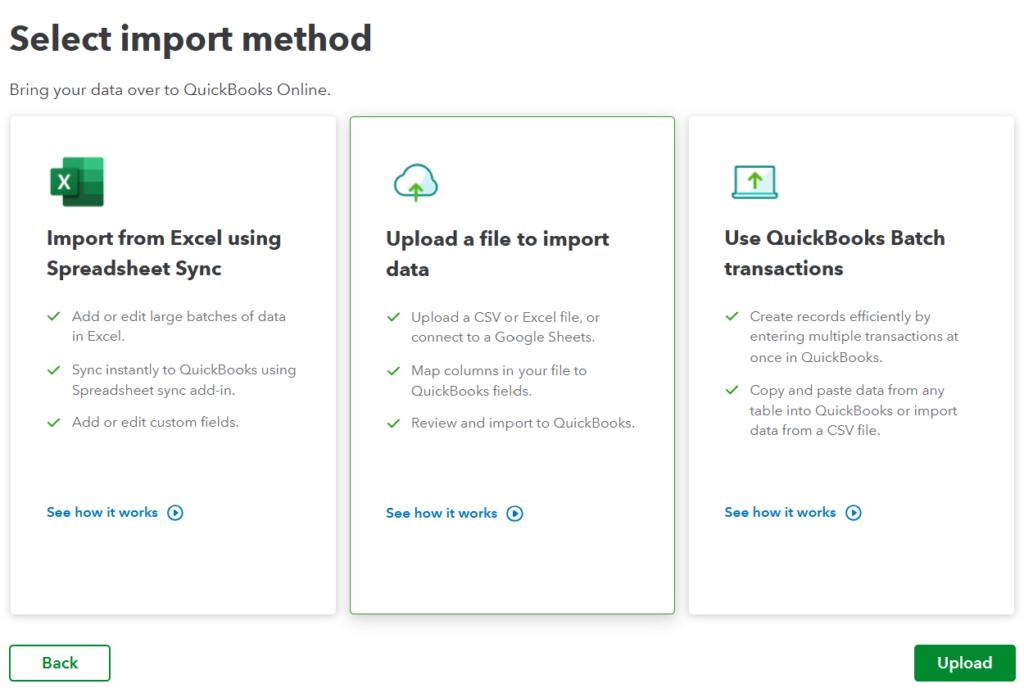
- Select import method → Upload a file to import data
- Click on the green button Upload
- Upload your CSV file > Browse
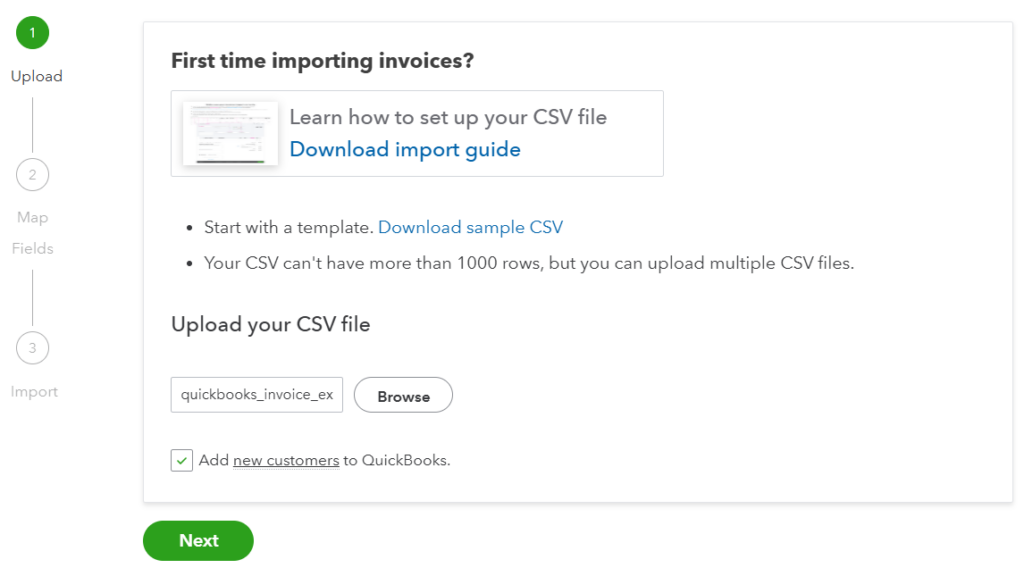
- Select your Usked Invoice Export file > Check Add new customers to QuickBooks
- Click the green button Next
Step 4 – Map Fields #
All mandatory fields must be mapped before proceeding. You may skip Terms and Memo.
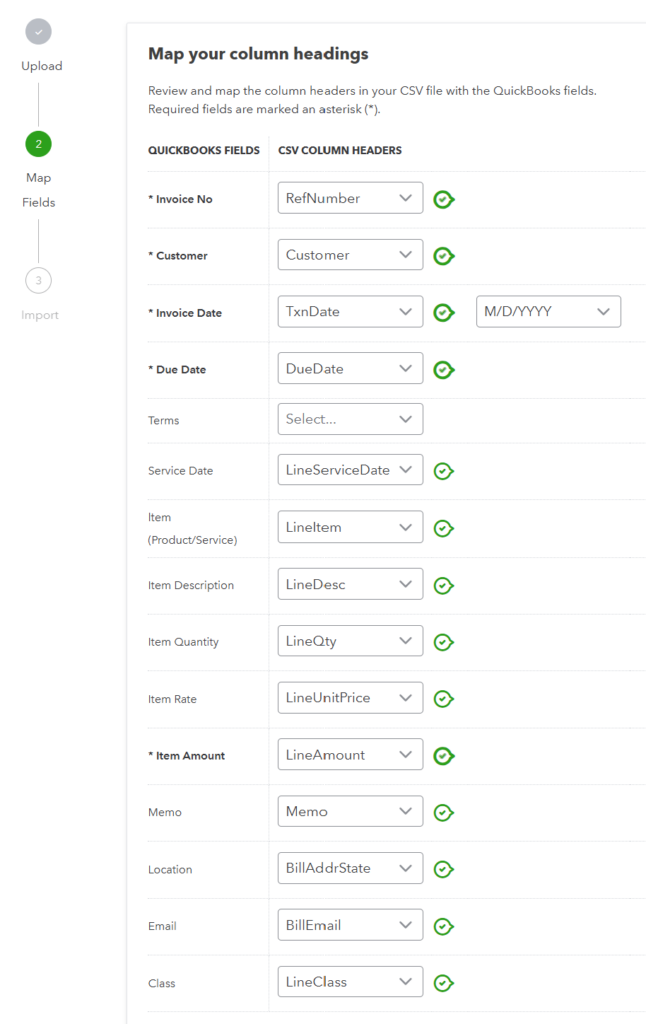
- Select RefNumber (Invoice No.)
- Select TxnDate (Invoice Date)
- Choose your Invoice Date format
- Leave DueDate as is (Due Date)
- Optional: Terms
- Select LineItem (Item (Product/Service))
- Select LineDesc (Item Description)
- Select LineQty (Item Quantity)
- Select LineUnitPrice (Item Rate)
- Select LineAmount (Item Amount)
- Optional: Memo
- Re-select BillAddrState (Location)
- Leave BillEmail as is (Email)
- Re-select LineClass (Class)
Step 5 – Validate and Import
- After you click Next, you should see “You’re good to go” followed by the number of invoices that will be imported
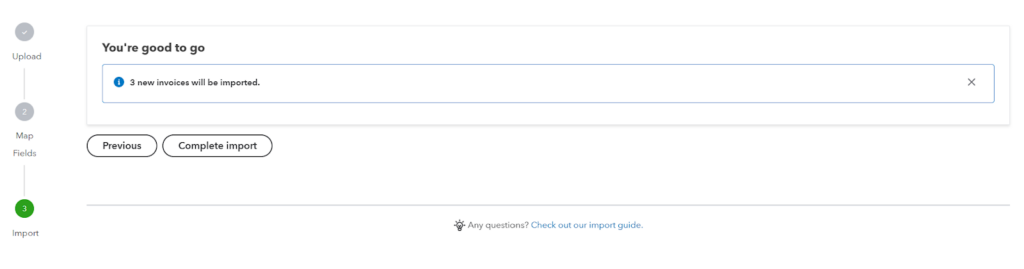
- Wait for the import to complete
- Review The results are in
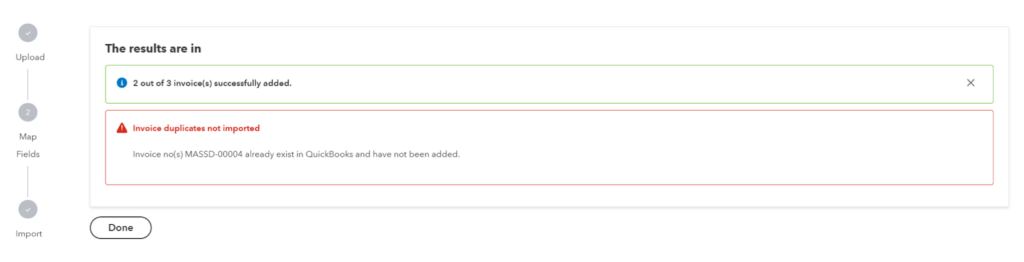
| Error | Cause | Solution |
| Duplicate invoice | RefNumber is not updated | Change RefNumber in the Usked Invoice Export |
| Missing Products & Services, Classes, and/or Classes | Item not created under Products & Services, Classes, and/or Locations | Update Lists in QBO |
| Comments | LineQty is empty | Add 0 in the Usked Invoice Export File |
| Address mismatch | Customer address is not matched in QBO | Update QBO Customer Hub |
- Click Done
Review and Submit Customer Invoices #
- Step 1 – Update Invoice Template
- Step 2 – Update Message Template
- Step 3 – Review Customer Invoices
- Step 4 – Submit Customer Invoices
Step 1 – Update Your Invoice Template #
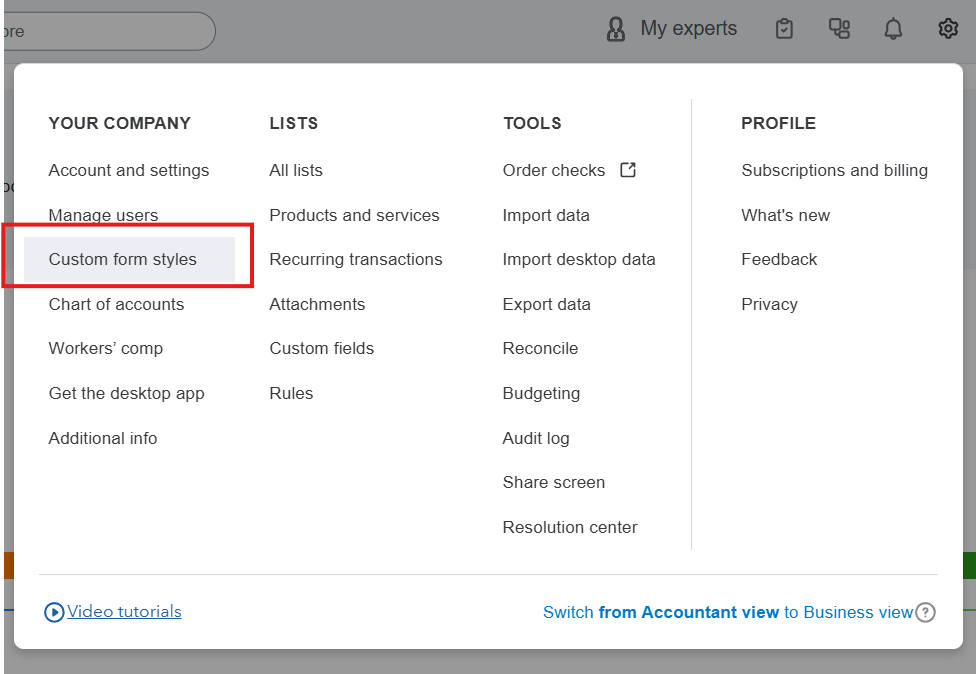
- Settings > Custom form styles
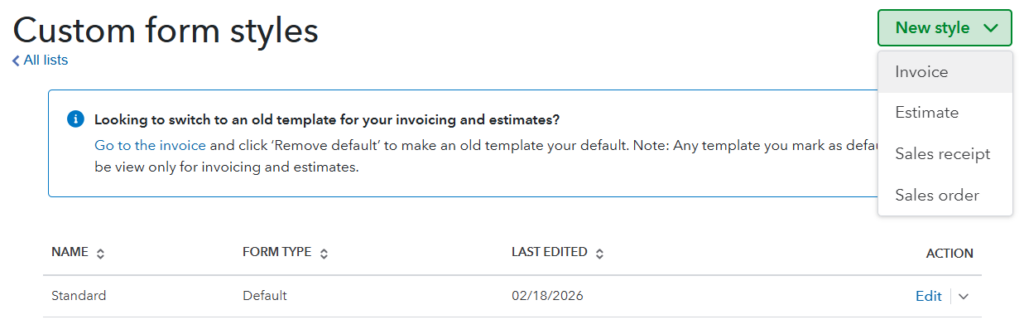
- Click New style > Invoice
- Create the invoice template
- Click Done
- Click Edit next to your new template
- Set it as default
Step 2 – Update your QBO Message Template #
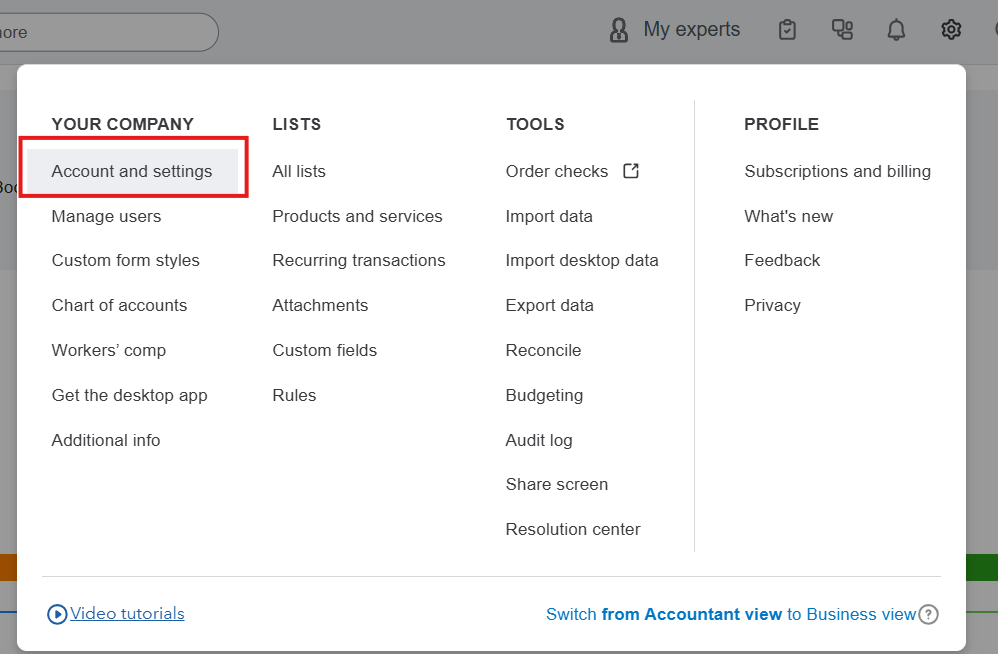
- Settings > Account and Settings
- Click on Sales on the left side
- Click the pencil icon next to ‘Messages’
- Update email address and other fields if needed
- Click on Done
Step 3 – Review Customer Invoices #
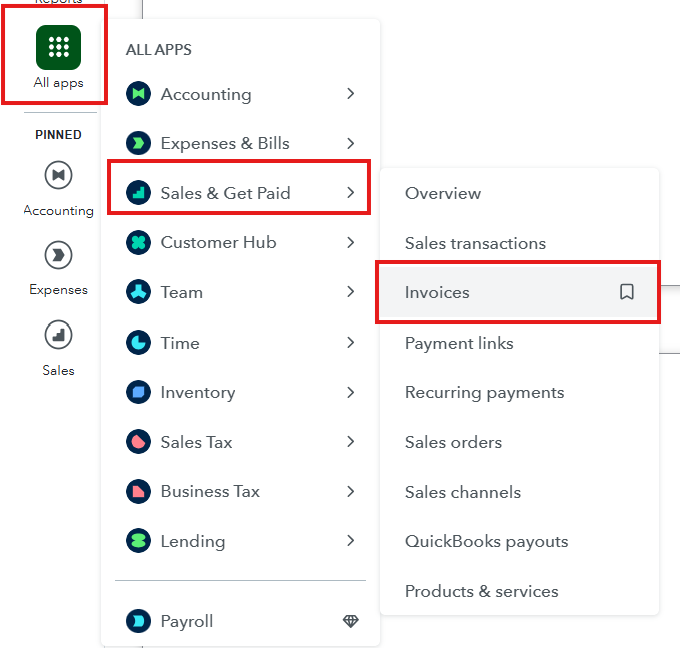
- All apps →Sales & Get Paid → Invoices
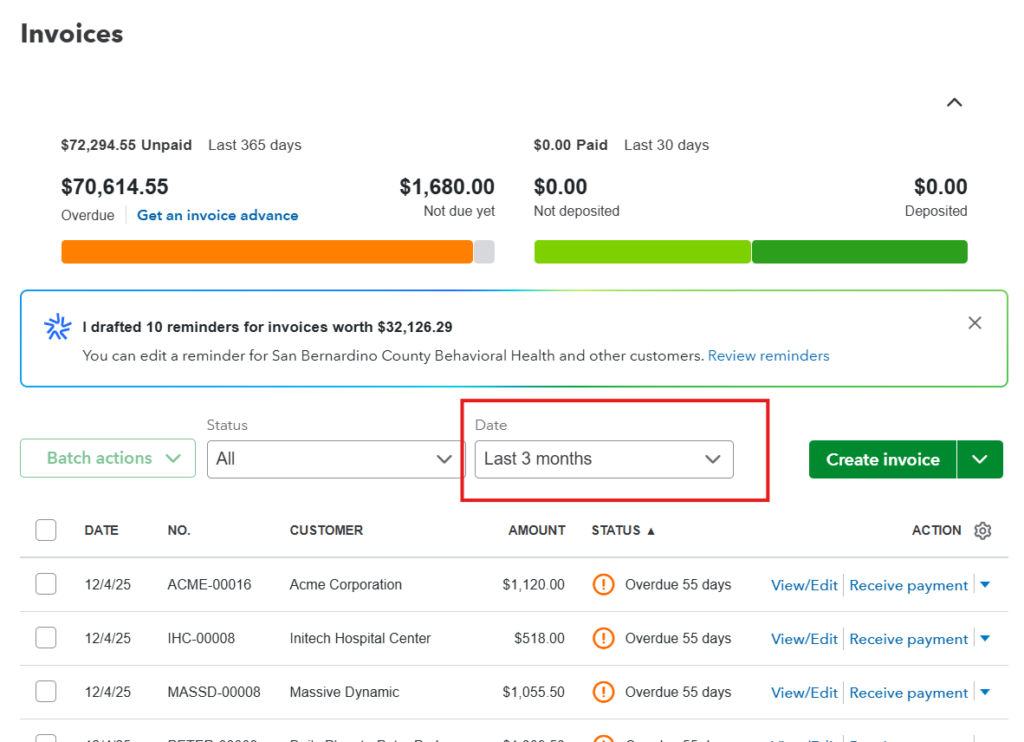
- Select a Date Range to include Invoice Date
- Select all invoices
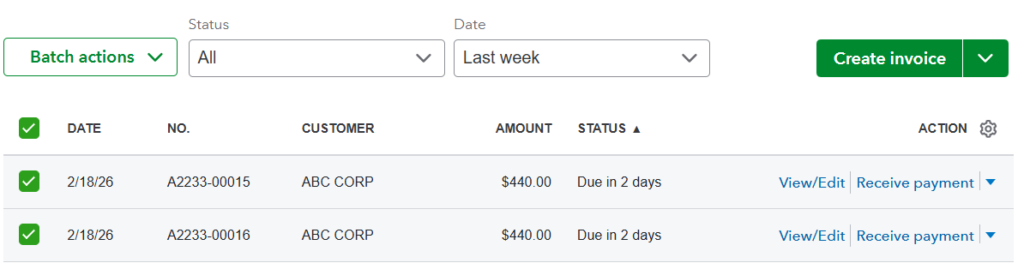
- Click on Batch actions → Print
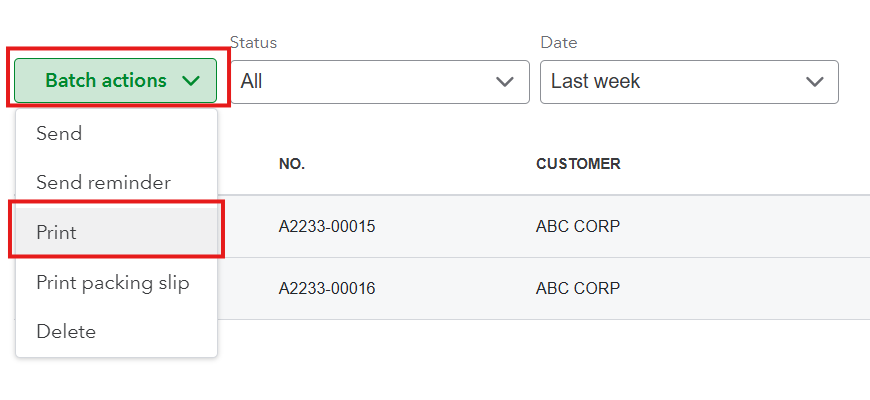
- Review the batch of invoices
- Click View/Edit if you see incorrect information
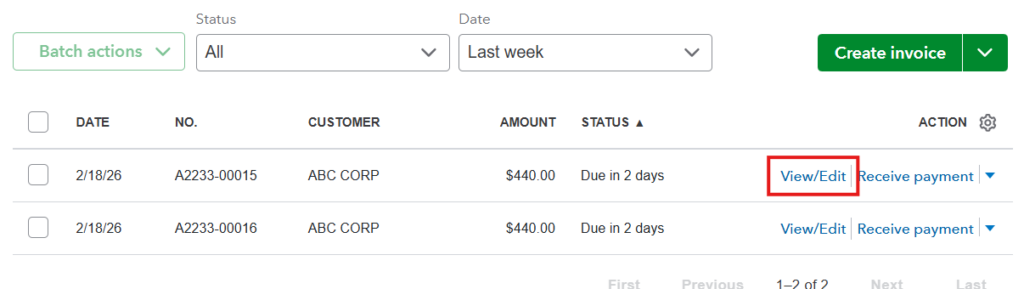
- Edit any information as needed
- Click Manage to ensure that the correct template is set by default
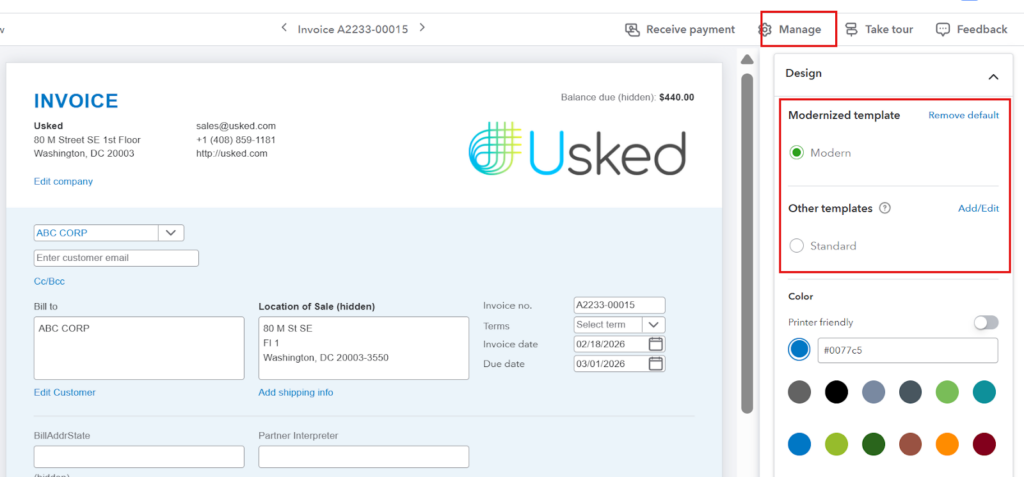
- Click on Save
Step 4 – Submit Customer Invoices #
- Select all invoices
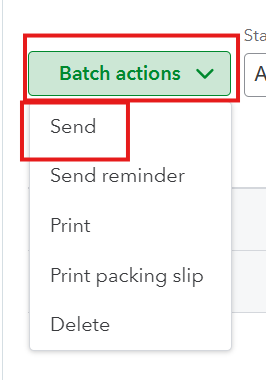
- Click Batch actions → Send
Note: This submit all invoices at once.