
Import and Submit Customer Invoices via Transaction Pro
Purpose #
This procedure outlines the steps required to set up Transaction Pro and prepare users to import data into QuickBooks Online (QBO).
System Access #
Systems: QuickBooks Online and Transaction Pro
Login: Log in to QBO using your assigned credentials.
Procedure #
- Prepare Usked Invoice Export File
- Import via Transaction Pro
- Submit Customer Invoices via QBO
- Step 1 – Update Invoice Template
- Step 2 – Update Message Template
- Step 3 – Review Customer Invoices
- Step 4 – Submit Customer Invoices
- Review Products and Services (if required)
Prepare Usked Invoice Export File #
- Billing Menu → Reports → Customer Billing → QuickBooks Invoice Export
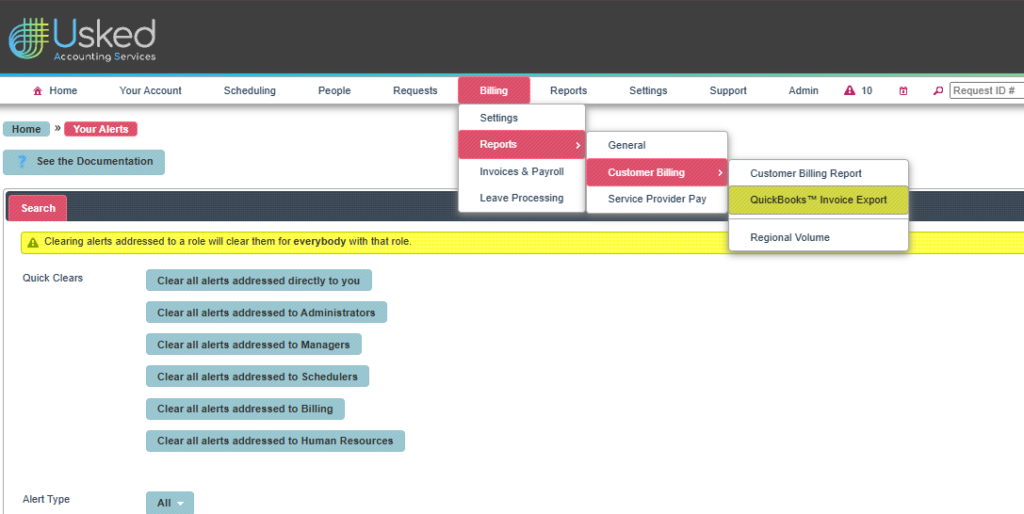
- Update the Start/End Date in the search criteria.
- Click Search.
- Download the CSV File.
- Add the following columns:
- TxnDate → Invoice Date
- DueDate → Invoice due Date
- Location → 2-letter state (OPTIONAL)

- Verify the Refnumber column
- No duplicate invoice numbers
- Invoice numbering follows billing sequence.
⚠️ Duplicate invoice numbers will cause import failures.
- Save the updated file to your computer
Import via Transaction Pro #
This process automatically generates customer invoices, including customer addresses, products and services, locations, and/or classes.
- Go to Transaction Pro.
- Click OPEN APP.

- Click SELECT >>

- Click Import File.
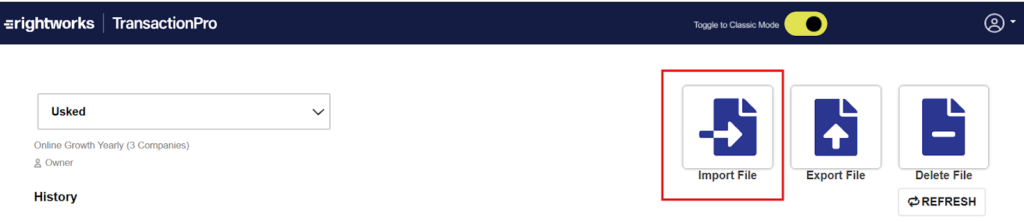
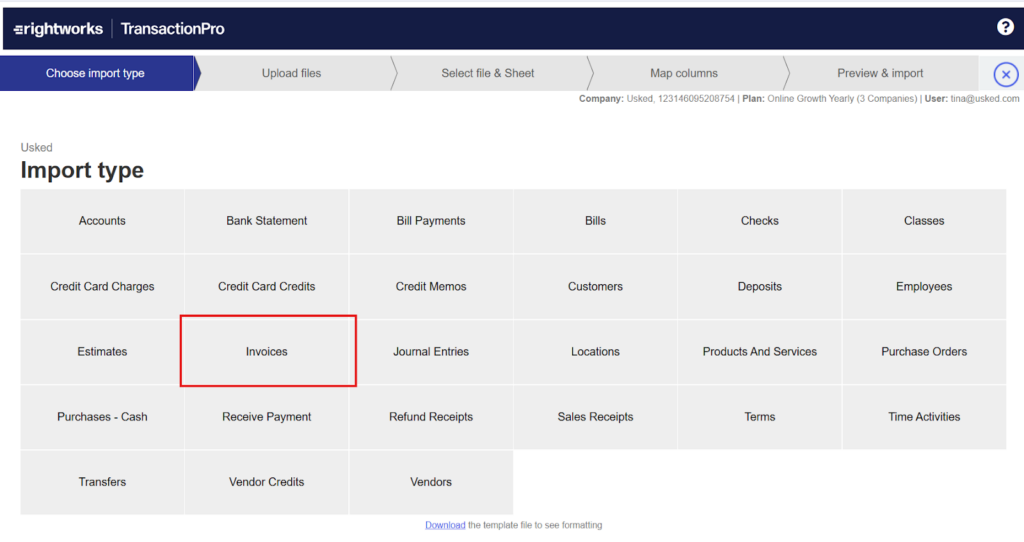
- Click Invoices.
- Drop and drop the CSV file, or click to browse and select the file.
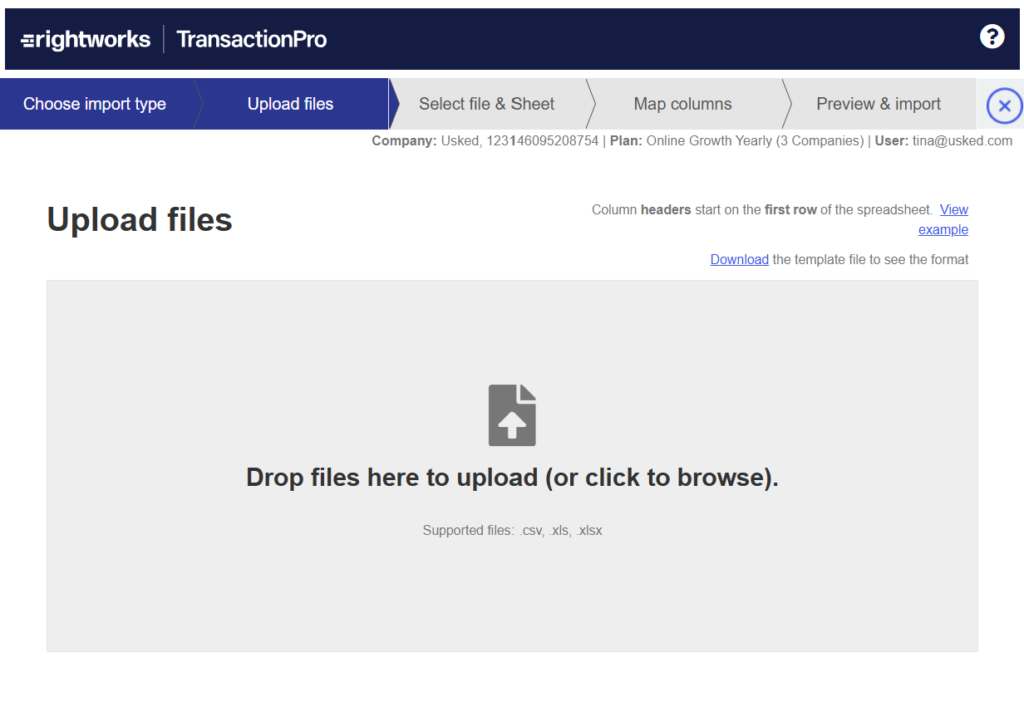
- Click SELECT FILE & SHEET →
- Click IMPORT SHEET (ensure file type is CSV).
- Click Auto-Match Columns.
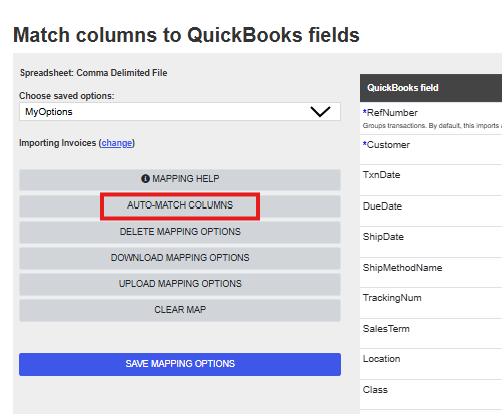
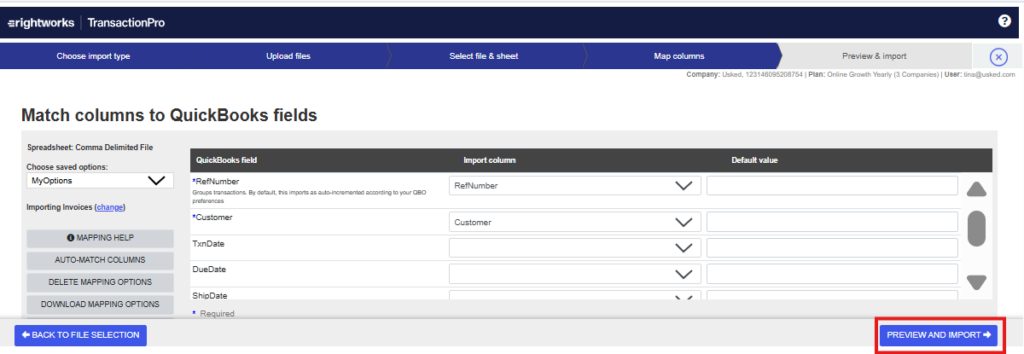
- Review QuickBooks Fields and Import columns.
- Click PREVIEW AND IMPORT →
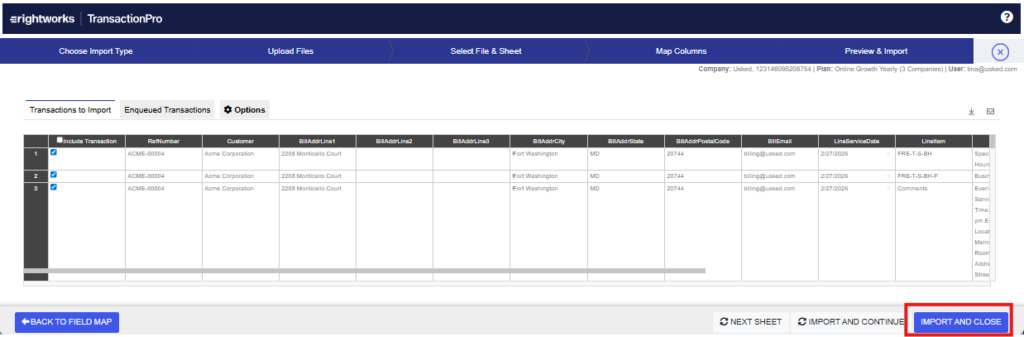
- Click IMPORT AND CLOSE.
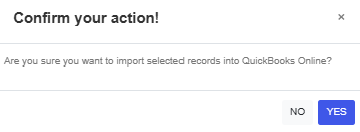
- Click Yes.
- Status will display ‘In progress.’
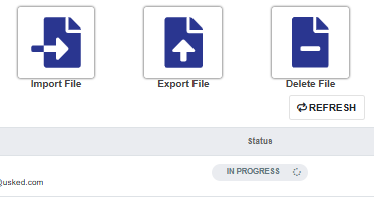
- Click Refresh to update status.
- If Status = Failed, Click ‘Failed’ to view details.
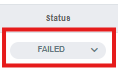
- Click click here

- Select any highlighted transaction row under Transactions to Import
- Review the error message. The most common is duplicate invoice number (refnumber).
- Fix by updating RefNumber values, or re-uploading a corrected file.
- Click Retry Import.
- If the status says Completed, Skip to Review and Submit Customer Invoices.
Review and Submit Customer Invoices #
- Step 1 – Update Invoice Template
- Step 2 – Update Message Template
- Step 3 – Review Customer Invoices
- Step 4 – Submit Customer Invoices
Step 1 – Update Your Invoice Template
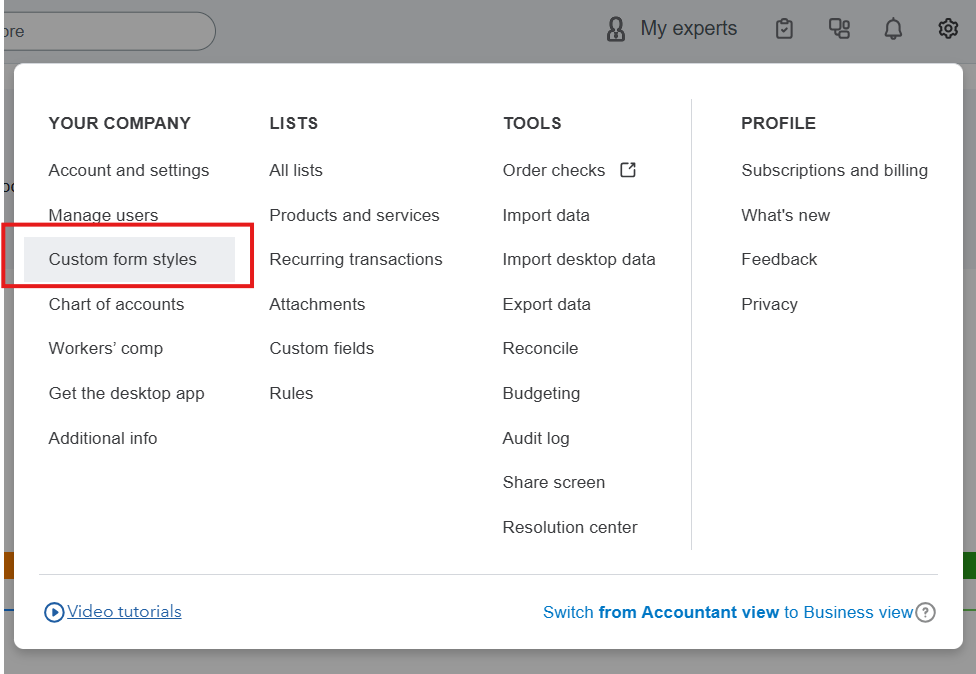
- Settings > Custom form styles
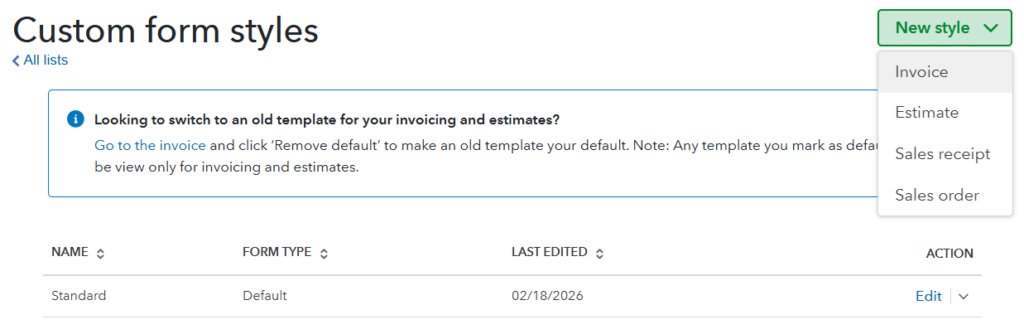
- Click New style > Invoice.
- Create the invoice template.
- Click Done.
- Click Edit next to your new template.
- Set te template as Default.
Step 2 – Update your QBO Message Template
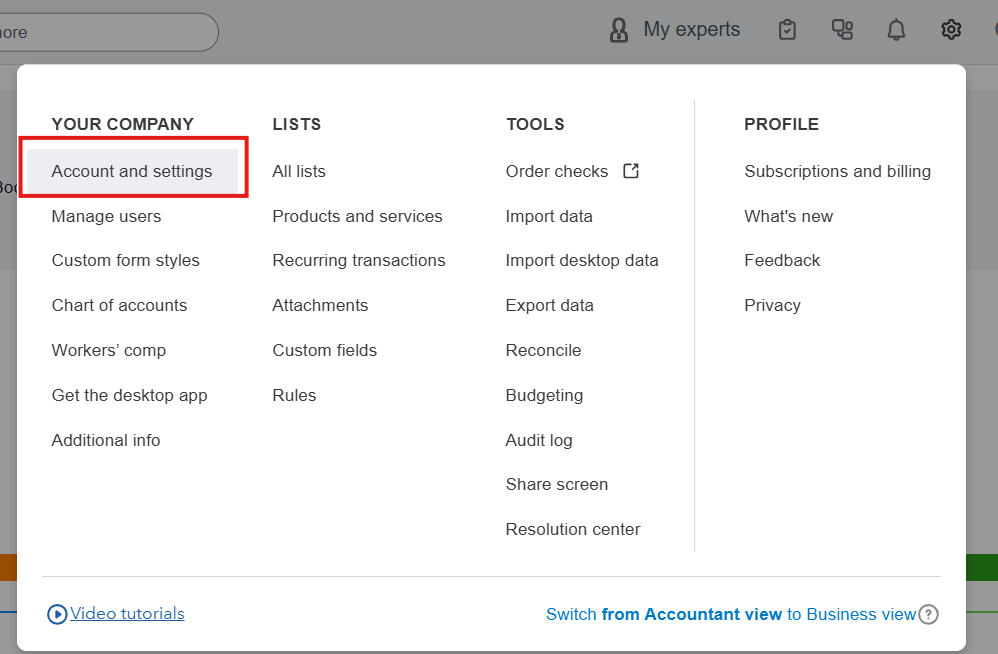
- Settings > Account and Settings
- Click Sales on the left side.
- Click the pencil icon next to ‘Messages.’
- Update email address and other fields if needed.
- Click Done.
Step 3 – Review Customer Invoices
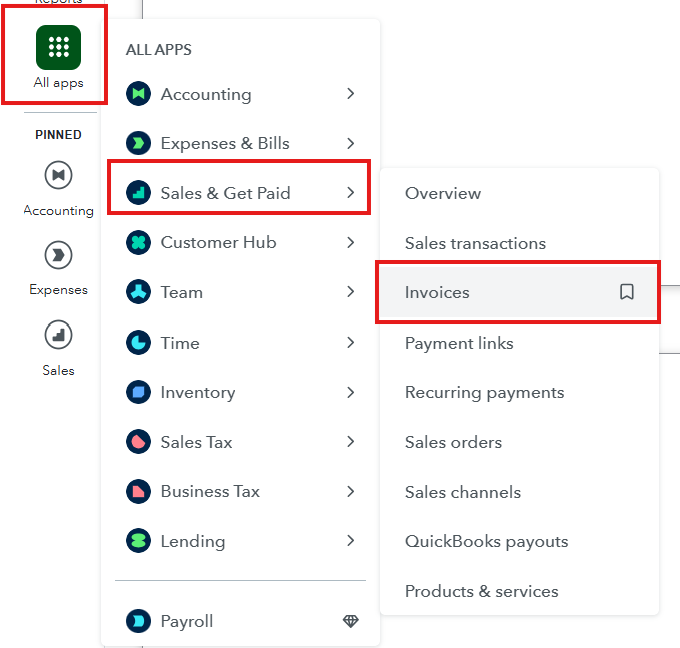
- All apps →Sales & Get Paid → Invoices
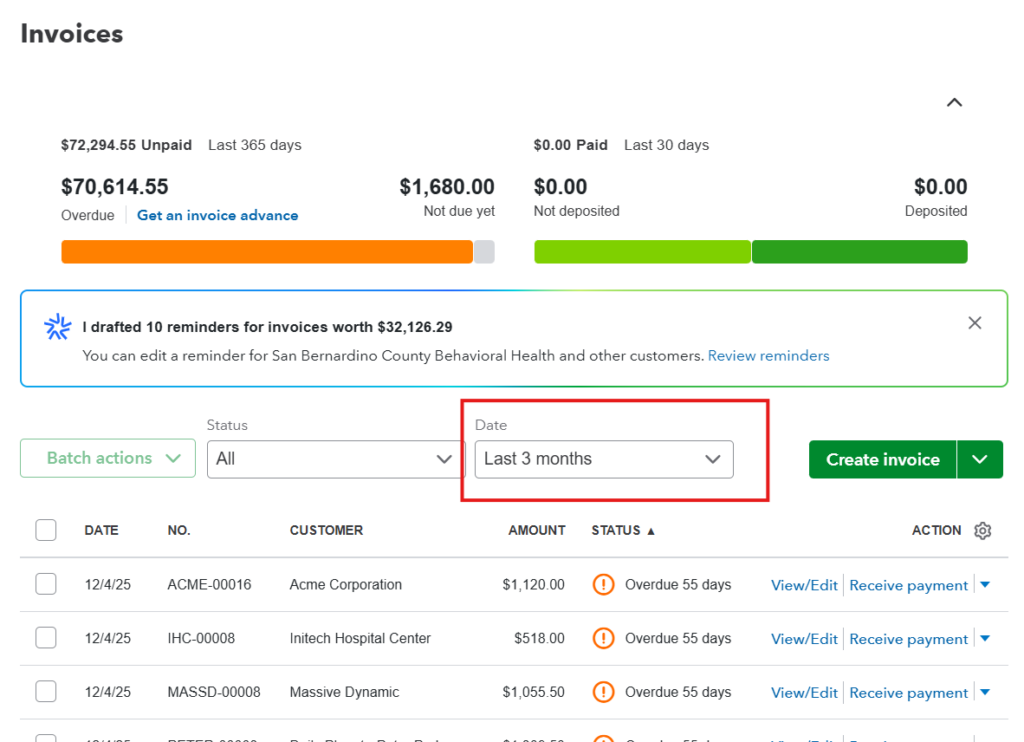
- Select a Date Range that includes the invoice date.
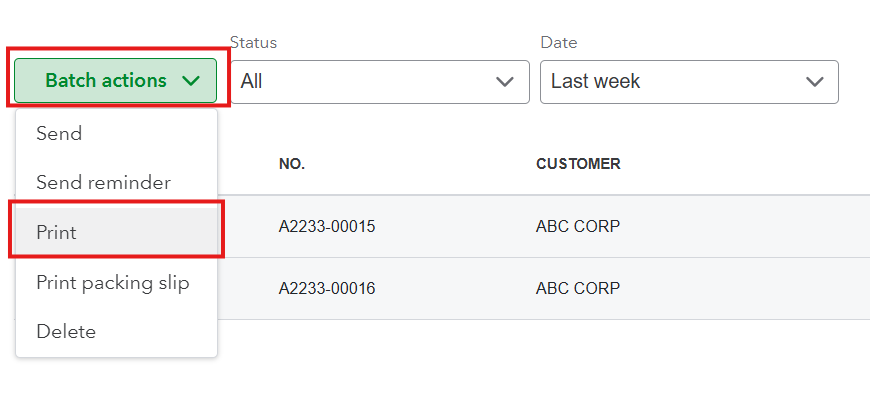
- Select all invoices.
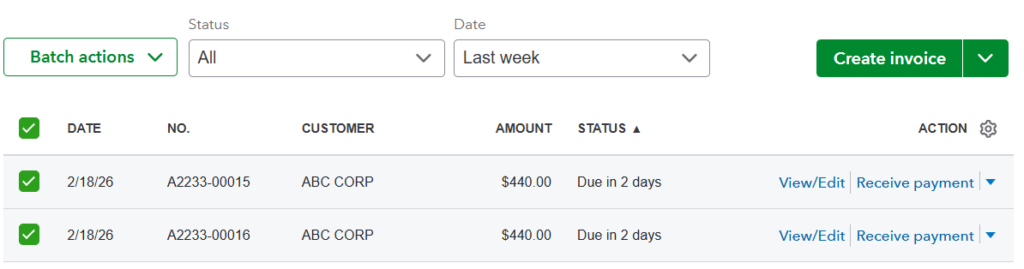
- Click Batch actions → Print.
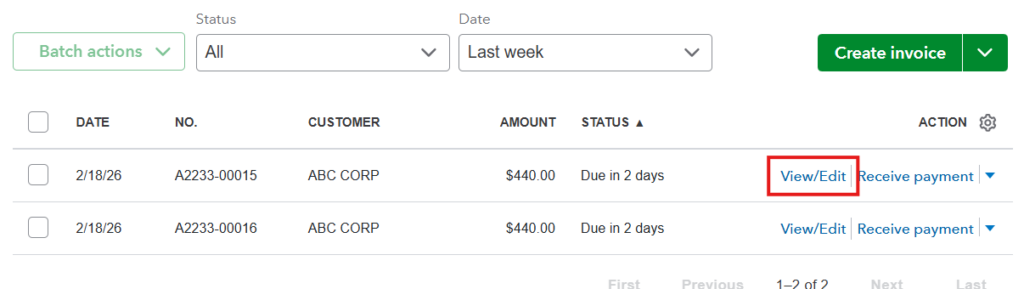
- Review the batch of invoices.
- Click View/Edit if you see incorrect information.
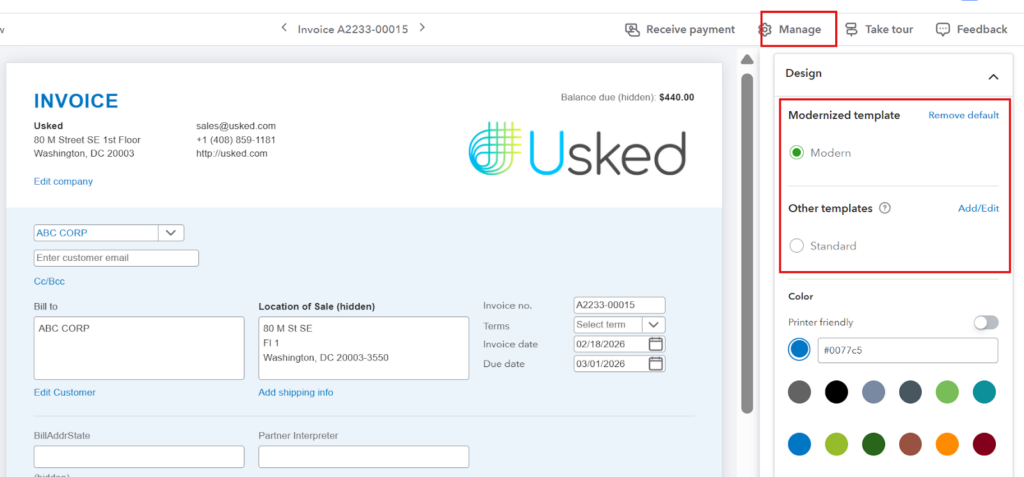
- Update information as necessary.
- Click Manage to ensure that the correct template is set by default.
- Click Save.
Step 4 – Submit Customer Invoices
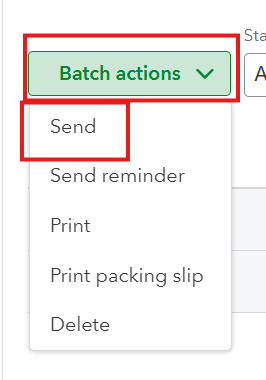
- Select invoices.
- Click Batch actions → Send
Note: This submit all invoices at once.
Review Products and Services #
Use this step only if you need to create new Products and Services using the import file.
If all required Products and Services already exist in QuickBooks Online, you may skip this section.
- Step 1 – Navigate to Products and Services
- Step 2 – Edit a Product or Service
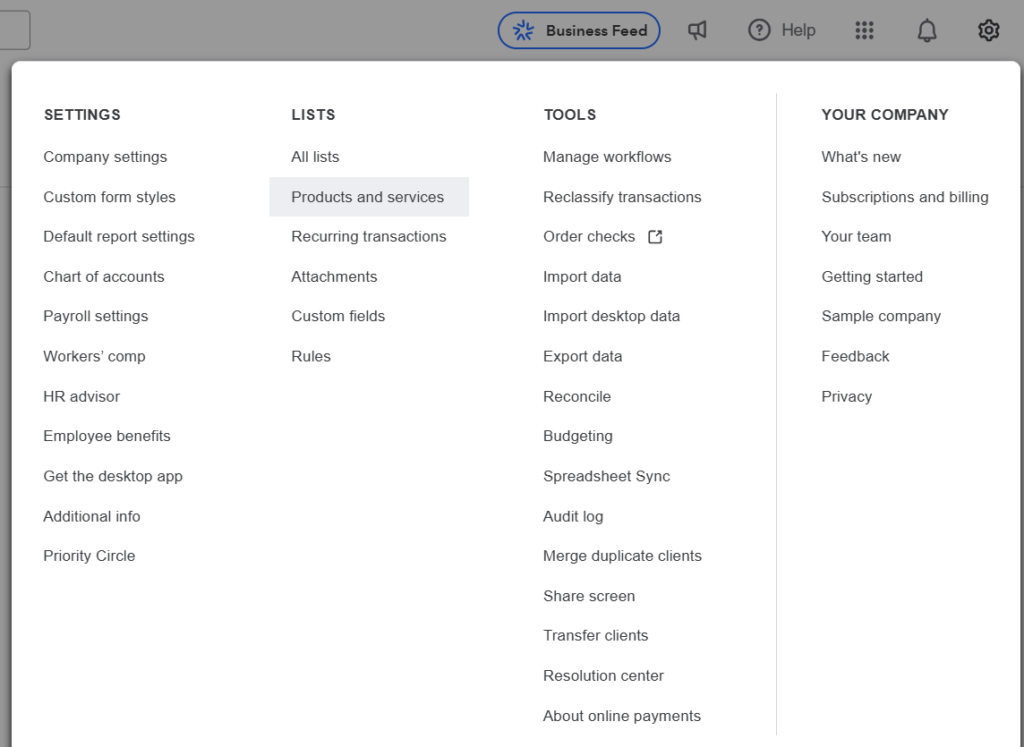
Step 1 – Navigate to Products and Services #
- Go to Settings ⚙️
- Lists → Products and Services
Step 2 – Edit a Product or Service #
Ensure each Product or Service is mapped to the correct Category, Class, and Income Account.
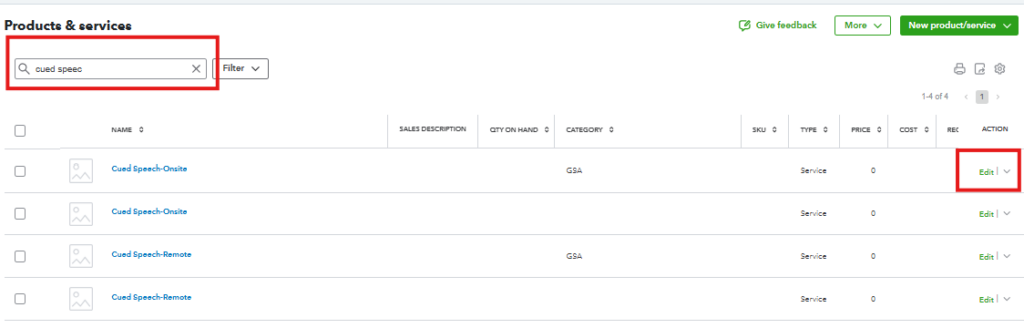
- Search for the new Product or Service created through Transaction Pro.
- Click Edit in the Action column.
- Review Category, Class and Income Account*
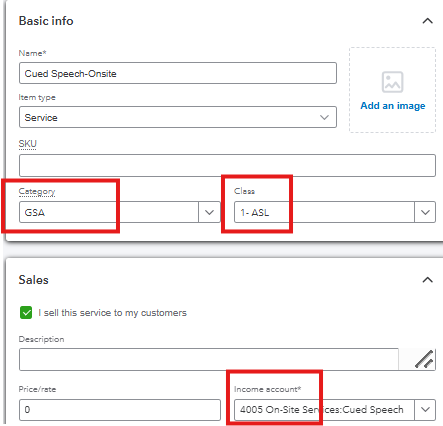
- Leave Description blank amd keep Price/rate set to 0.
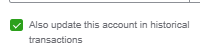
- Select Also update this account in historical transactions
- Click Save
Want to learn more about how to add Products and Services? Click here.